Ever ponder how artisan bread makers consistently produce perfectly round loaves? They use a proofing basket in addition to their years of experience to ensure that the loaves maintain their form and structure until the final rise.
Proofing baskets have likely been in use for a very long time. The reason to use basket for proofing is simple: before metal was established and moulded into bread tins, people started to weave and make objects out of reeds, clay, and grasses and turn wood. Using proofing baskets can be mastered when you take up professional bakery courses in Chennai, as these baskets are not only for professional but also for home bakers who wishes to master baking skills.
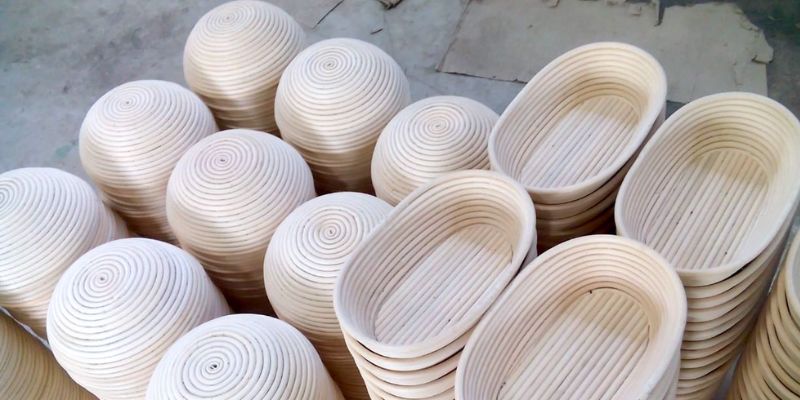
Proofing Basket: What Is It?
Proofing baskets, also known as bannetons and brotforms, come in almost every size and shape, including oval, long, and round. Line them with linen to give your bread a smooth texture, or leave them unlined, and the basket’s shape will show through on your baked goods. Bakery classes in Chennai explain that using a basket to support the dough, as it proves, will prevent the bread dough from flattening and spreading out as it rises.
Proofing Basket: How to Use It?
To use one, coat the basket completely—either the empty basket or the linen liner—with flour and shake out the excess before using it. Complete the entire kneading process, including the shaping. Instead of proving it on the counter, flour the loaf’s exterior before inverting it all into the proofing basket. For wood fibre baskets, initial preparation is not required; instead, they just require a light dusting of flour before each usage.
Although some bakers prefer to use rice flour, baking classes in Chennai suggest to utilise the wheat flour that is also primarily used for the bread dough itself. It’s better to use too much flour than not enough, especially if you’re a beginner baker and aren’t used to using the baskets. Before the bread goes into the oven, or better yet, after baking, any excessive flour can be carefully cleaned using a brush.
Turn the bread over carefully on a baking sheet or bread peel to release it from the proofing basket. The dough will typically fall out on its own if you hover the basket over the surface. When the dough is inverted in the basket the top of the dough faces the bottom of the basket and the dorsal side will be visible on the top. To bake, spread a piece of parchment paper or cornmeal over your baking sheet.
Proofing Basket: How Not to Use It?
Taking up baking courses in Chennai will help you know how not to use the proofing basket. A proofing basket is, as its name implies, just for letting the dough proof; it cannot be used in place of a baking pan or be placed in the oven. Do not wash your baskets; instead, after each use, brush off the extra flour and dry them in a warm, moist-free dry place. It’s crucial that your baskets are never kept damp in storage to avoid the growth of mould. Periodically, you should brush out your basket with a firm and hard brush to get rid of any leftover flour.
