Introduction:
In the realm of baking, creativity knows no bounds. From intricate designs to mouthwatering flavors, the possibilities are endless. One such trend that has taken the baking world by storm is the fault line cake. If you’re unfamiliar with this delightful creation, fear not! In this blog post by Baking class, The best baking classes in Chennai, we’ll dive into the fascinating world of fault line cakes, exploring what they are and how you can make your very own masterpiece.
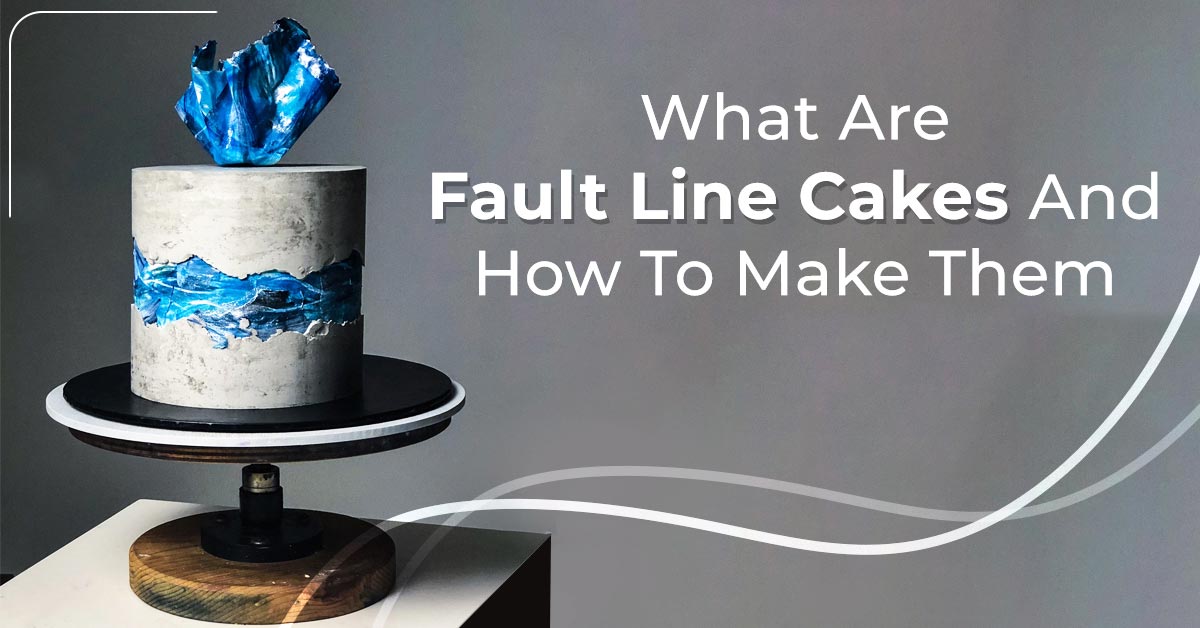
What are Fault Line Cakes?
First things first, let’s address the question: what exactly is a fault line cake? Imagine a traditional layer cake but with a unique twist. Fault line cakes feature a prominent “fault line” running across the middle of the cake, revealing contrasting colors, textures, or decorations. This design element adds depth and visual interest to the cake, making it a real showstopper for any occasion.
The beauty of fault line cakes lies in their versatility. Whether you prefer elegant floral designs, vibrant sprinkles, or sophisticated metallic accents, there’s a fault line cake to suit every taste and style. From birthdays to weddings to simply yeild to in a sweet treat, these cakes are sure to impress both the eyes and the taste buds.
How to Make a Fault Line Cake:
Now that we’ve piqued your interest, let’s get down to the nitty-gritty of making your own fault line cake. While the process may seem intimidating at first, with a bit of practice and patience, you’ll be whipping up stunning creations in no time. Here’s a step-by-step guide to help you along the way:
1. Gather Your Ingredients:
Start by preparing all the necessary ingredients for your cake batter, frosting, and any additional decorations you plan to use. Choose flavors and colors that complement each other to create a visually stunning final product.
2. Bake Your Cake Layers:
Prepare your cake batter according to your favorite recipe and bake it in multiple layers. Allow the layers of cake to cool down completely before proceeding to the next step.
3. Prepare Your Frosting:
Whip up a batch of your preferred frosting. Buttercream is a popular choice for fault line cakes due to its versatility and stability. Divide the frosting into different bowls and tint each one with food coloring to create the desired colors for your fault line. Join our cake making classes in Chennai to get trained in the art of making frosting for your cakes.
4. Assemble Your Cake:
Once your cake layers are cooled, level them if necessary to ensure even stacking. Begin by spreading out a layer of frosting on top of the first cake layer. Place the second layer on top and continue this process until all layers are stacked.
5. Create the Fault Line:
Using an offset spatula or knife, carefully carve a horizontal line through the frosting around the middle of the cake. This is where the “fault line” will be.
6. Decorate the Fault Line:
Fill the fault line with your contrasting frosting colors, sprinkles, edible flowers, or any other decorations of your choice. Get creative and experiment with various textures and patterns to achieve the desired effect.
7. Add Final Touches:
Once the fault line is decorated to your liking, add any final touches to the top and sides of the cake. Pipe additional frosting, arrange fresh fruit, or dust with edible glitter for an extra of glamour.
8. Chill and Serve:
Place the cake in the refrigerator to allow the frosting to set before serving. Once chilled, slice and enjoy your masterpiece with friends and family!
Conclusion:
Fault line cakes offer a fun and innovative twist on traditional layer cakes, allowing bakers to unleash their creativity and imagination. Whether you’re a seasoned pro or a novice baker, experimenting with different designs and flavors is all part of the fun with our best baking classes in Chennai. So why not give it a try? With a little bit of practice and a whole lot of love, you’ll be creating stunning fault line cakes that are as delicious as they are visually stunning. Happy baking!
